Table of Contents
Table of Contents
Designing the Scene
User Interaction in Scene
Mouse input
Keyboard input
Critical Analysis
Difficulties Encountered
Possible Improvements to be Made
Appendices
Scene Captures and Features
Scene Graph of Code
Designing the Scene
Since it was instructed that the starting point of the project should be the provided template, it was deemed necessary to adopt and alter/improve the given source code for the rotating cube and bouncing ball provided, such that new rendering techniques such as material and colour could be used.
Since the scene was intended to contain a building, it seemed fair to make one building the main piece, and have other architectural accompaniments such as trees and/or furnishings for the building. Given that the main building was to be the largest object for attention purposes, and I intended to utilise lighting and fog in order to create an environment, it was decided that a reasonable architecture choice for this building would be a clock-tower/bell-tower in the middle of a hypothetical village, as a clock-tower offers a desirable range of shapes that could be used to create it, such as circles for the clock face, cuboids for the tower and furnishings, a cone for the roof and a a choice of shapes for the base of the tower.
Listed are the shapes used in the clock-tower and accompanying tree:
Roof of tower – CylinderGeometry (edited to appear as a cone)
Body and furnishings of tower – CubeGeometry (stretched to become cuboid)
Base of tower – CylinderGeometry (edited to appear as a trapezium spun in the Y axis)
Body of tree – CylinderGeometry
Bush of tree – IcosahedronGeometry (used to emulate the chaotic nature of a tree’s bushes)
Colours and materials were chosen specifically to create a realistic image;
- Grey was used on the furnishings to symbolise grey brick
- Brown was used on the body of the tower to represent red brick
- Gold was chosen as the face of the clock on the tower, as well as the roof to indicate a gold plated roof.
- The roof is also rotated constantly through code and its aesthetic attributes set to shine, in order to give the illusion of the roof reflecting sunlight. In addition to this, the material used for the roof specifically was “MeshPhongMaterial”, as it is used to create shiny surfaces with specular lighting, a quality often found in gold plating.
- The body of the tower used a material choice called “MeshLambertMaterial” which is used to create flat looking surfaces which do not reflect light, which is a quality found in brick and mortar materials.
Having such a tall and isolated object in the scene made it appear empty, so it was decided that implementation of an altered version of the helicopter script in order to emulate a helicopter spiralling through the tower, such that is circles it whilst rising. This was done through script by altering and removing/rearranging the parent to child relationship of some elements, as well as implementing new code to move the helicopter vertically upwards. This created a spiral pattern for the helicopter.
Placing and locating the building was a manual process, however, in order to keep furnishings stuck to the objects – such that they would remain on the parent object when moved – a method to change the locations of these pieces from absolute locations (relative to world) to relative locations to their respective parent (the tower).
This is a superior method of placing items, as their location is now relative to the item it resides in; If the item is to move or turn, they will remain in their relative place and hence would not require manual relocation.
Lighting in the scene is comprised of spot lights and directional lights. Spot lights are very useful as they generate high quality shadows from the scene, put only have a localised effect. A mixture of spotlights and directional light was used, such that shadows generated would be that of the directional light, but scene hue and colour would be generated from the directional light. Ambient light could have been used for this purpose, but ambient light has its own issues, one being the fact that is looks artificial and treats all objects in the scene indiscriminately, leading to a well-lit but strange looking scene. It was decided that if this scene was to illustrate a building with trees or a tree, it would be best to use directional and spot lights in order to create a more realistic and dynamic looking environment.
User Interaction in Scene
Mouse input
Mouse input in this scene is relatively straightforward. The user can use the mouse in order to interact with on screen GUI in order to manipulate variables in the scene, such as rotation speed of objects, the visibility of others, colours and even the time of day.
When the user clicks on the GUI, they can drag the value to a point or discretely click on this point to set these variables to higher or lower values. This directly affects the animation speeds of these two items, and is an example of how mouse input can be used to affect a 3D scene.
Toggle switches in the GUI is another way for users to interact with the scene, as they can choose to eliminate objects from the scene temporarily. In this case, the user can render the tree in the scene inactive using the toggle.
Keyboard input
Keyboard input is used to control camera movement as well as initiate some pre-set functions within the scene:
W – move camera forward
A – rotate camera left
S – move camera backwards
D – rotate camera right
O – tilt camera upwards
L – tilt camera downwards
Traversing using the WASD keys helps the user become immersed and creates a direct input for the user in this scene. This addition of tilting and moving the camera allows the user to pan through the scene and view it at different angles, therefore being able to see the way that lighting affects the scene with more accuracy.
Keyboard keys are used in this scene to also alter the materials in the scene:
- Pressing the “J” key allows the user to toggle the helicopter visible or not.
- Pressing the “K” key allows the user to change the colour of the material belonging to the base of the tower in the scene. Pressing the “K” changes the colour of the base to a randomised colour by altering a pre-set property within the material of the tower base itself.
- Pressing the “H” key allows the user to jump/alternate between two different lighting styles. One is a white spotlight, and the other is an orange/warm directional light. These two are in opposite visually active instances, so turning one off will turn the other one on. This is used to emulate night and day in the scene, and is an example of how keyboard controls can be used to change lighting styles.
Critical Analysis
Difficulties Encountered
During development, I encountered issues regarding the creation of geometry in scenes – specifically that of cones. It turned out that cones were not understood by the library, and that even though they were a recognised shape for three.js, implementing cones would make the scene fail to compile properly. A simple remedy for this issue was to use cylinders instead, and to adjust the vertex count such that it would only allow it to be presented as a cone – this was done by halving the vertex count, and thus is a simple workaround to the issue.
Along the production of the lighting in the scene, I found some issues with the shadows of objects appearing blocky in nature. Blocky shadows are formed when the orthographic light source has an error. This happens when the light source is too large for the object that is being lit.
This is an inherent issue with three.js, as it is a result of the way that directional light is done in three.js. This blocky effect is the result of an inherent issue with shadow maps in three.js, and is very difficult to avoid as it is an issue between this lighting technique and the camera. The camera has to change the shadow and transform it in order to appear in its own view, resulting in a blocky shadow. The simple solution for this would be to avoid using directional lights, and to use spot lights instead.
In three.js there is no way, with standard lights, to create a true orthogonal shadow. There is also no way to get the ideal coverage of the shadow map from the camera’s perspective.
Blocky shadow issue, eventually rectified in final build.
The main issue I noticed was the difficulty in introducing more complicated building shapes, such as three dimensional scaffolds and/or furnishings – no intricate details are creatable through code, apart from the utilisation of shaders. This is due to the design limitations of using primitive 3D graphics such as polymorphs, as intricate details would require either 3D models from third party software to be used, increasing file size, load time and lowering framerate — or to manually create details by putting together hundreds of primitive shapes, which would be extremely time consuming and inefficient.
I could not utilise textures or UV lightmaps, as they are considered large and external files, and also require linkage to a URL which holds them, meaning that the system assumes there will always be an internet connection available, which is not always the case, even though it runs on a webpage.
Variables which depend on each other cannot work, as one must be instantiated or introduced before the other. The system also offers no error reporting, therefore although code might compile, it won’t show anything.
Possible Improvements to be Made
If given more time, I would have liked to create an hour and minute hand for the clock, and make it rotate at certain speeds such that it would emulate real time. This could also be linked to the system clock such that it could display real time. This of course would require a significant amount of time, but I believe it would be entirely possible and would have improved the quality of the scene, as it would have turned the clock-tower into a fully functional clock.
I would have also liked to link the mouse input to turn the camera instead of relying on the A and D key, but this being said, it would make using the GUI very difficult since moving the mouse towards the menu would make the camera spin around. This could be remedied by creating a mouse-lock method that is called when a key on the keyboard is pressed. This would give the user the control over mouse movement, and would allow them to use the mouse to both interact with the scene and the GUI.
Appendices
Scene Captures and Features

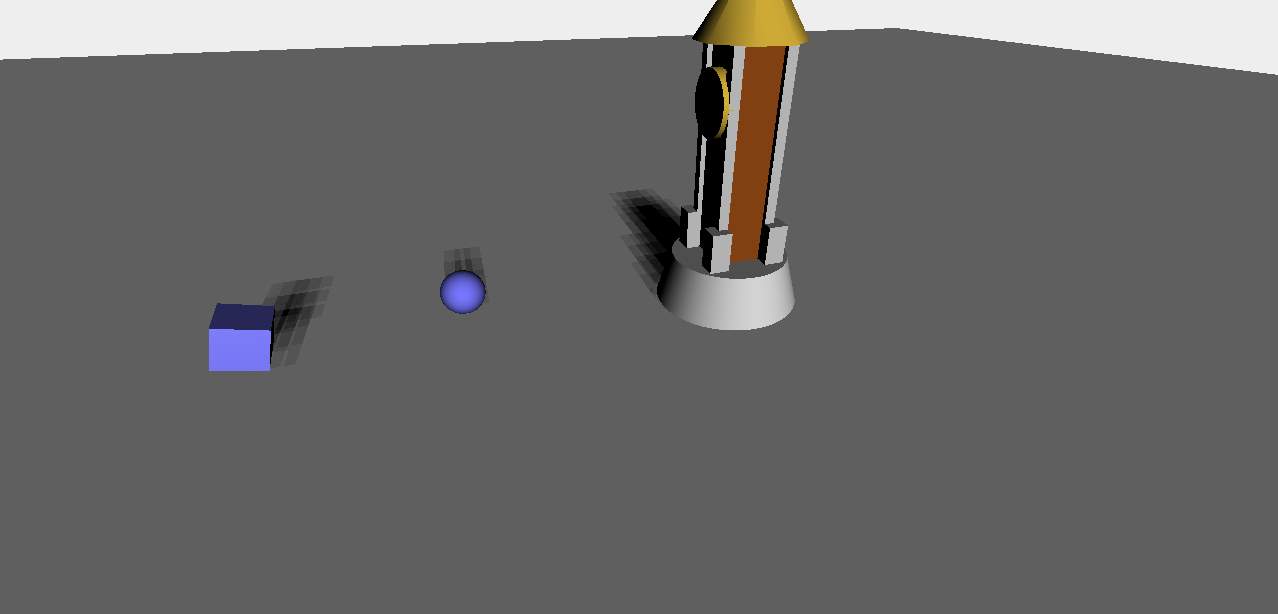
This is the default state of the scene upon starting. Here you can see that the ground is generated from a random colour, and the helicopter in the scene starts off at the bottom of the tower. Visible here is the colour choice for the tower and the trees.
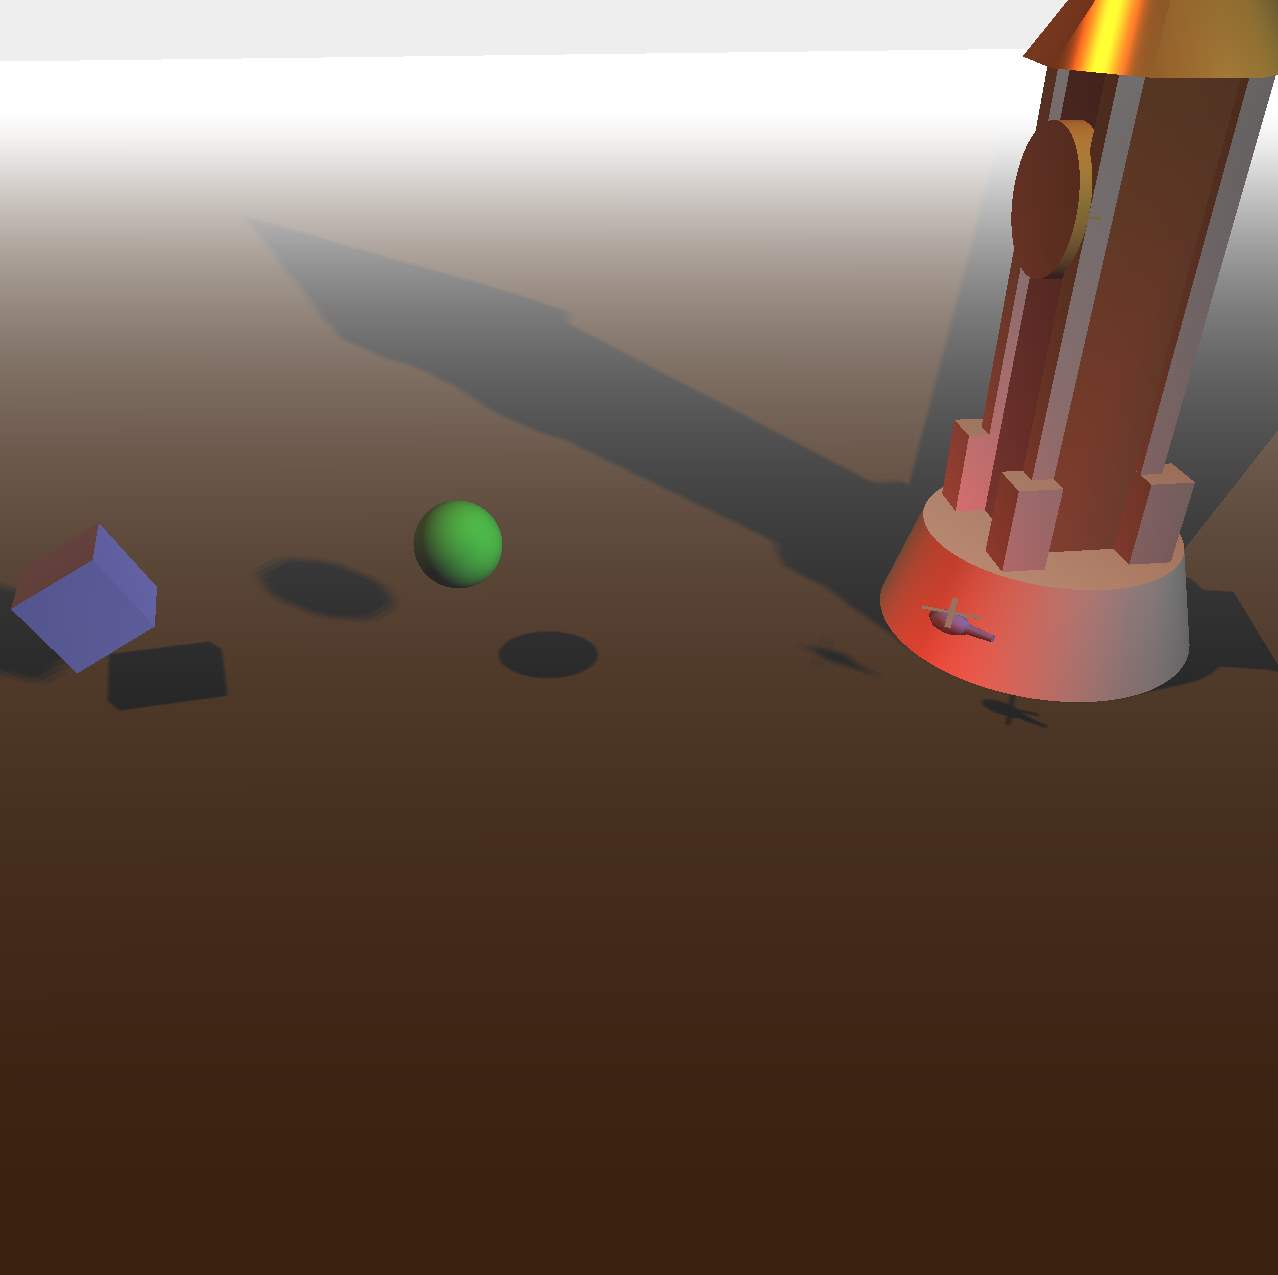
Here it is shows that the tree has been rendered invisible; this is done after clicking on the invisibility tab in the GUI. It should also be noted here that the artifacting of shadows is no longer present, as elaborated previously regarding directional lights and shadow maps.
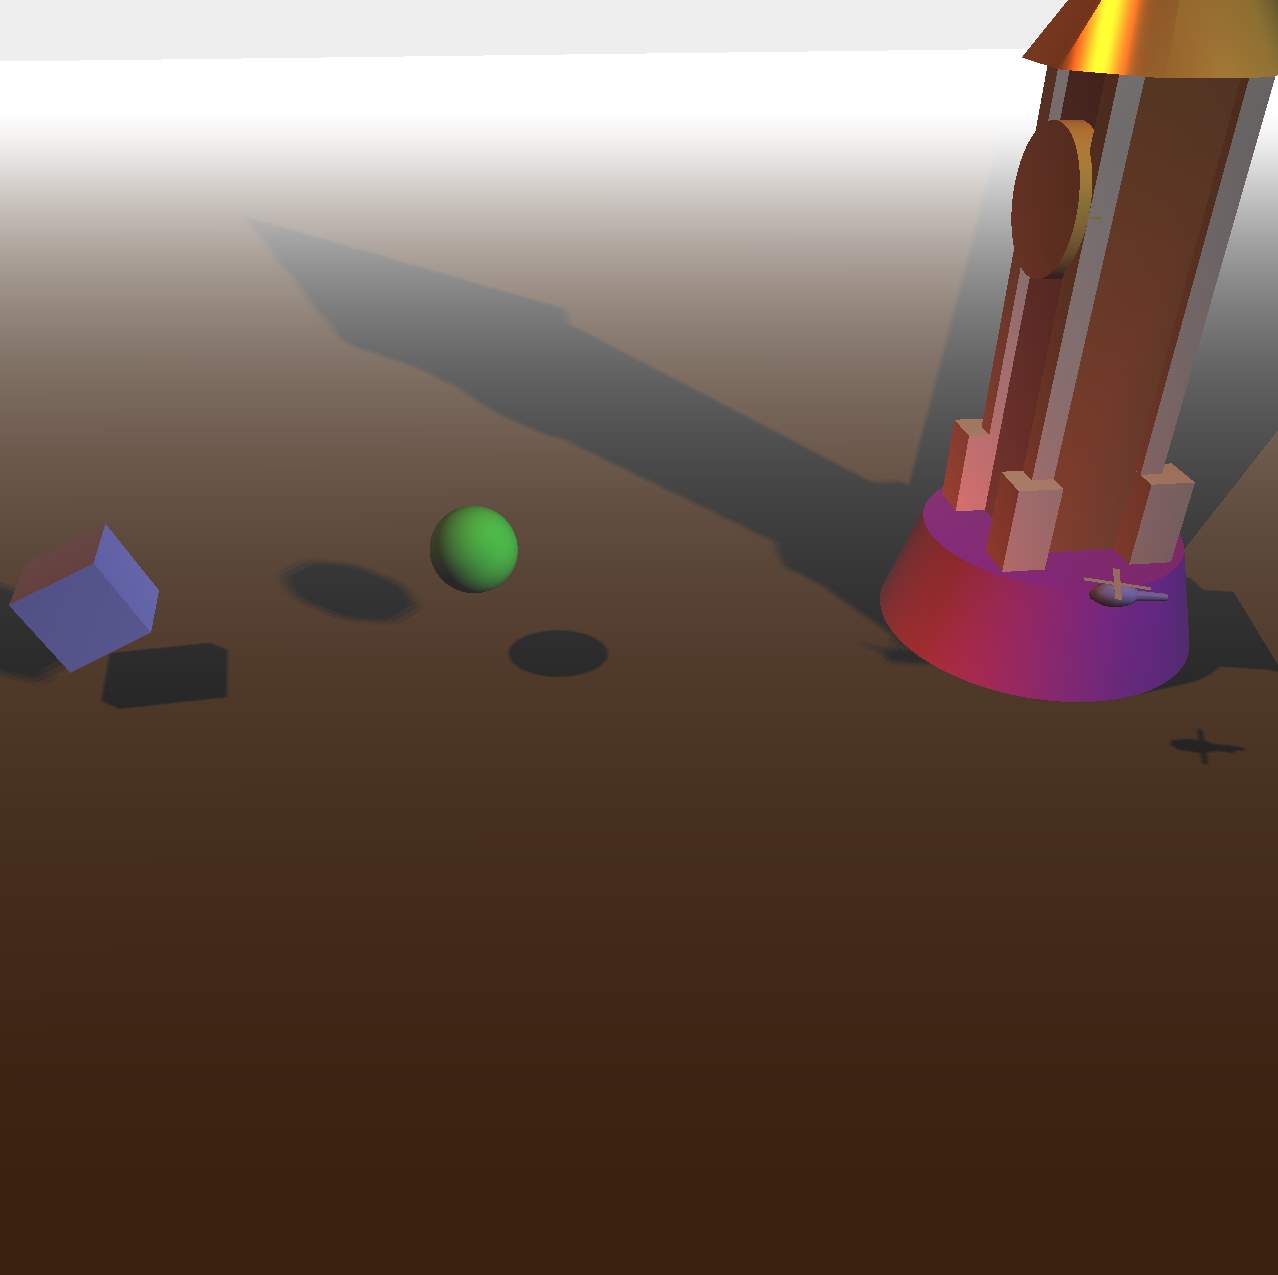
Here it can be seen that the base has changed colour; this is done when the “K” key is pressed, and is an illustration of how key input could be used to manipulate or interact with the scene.

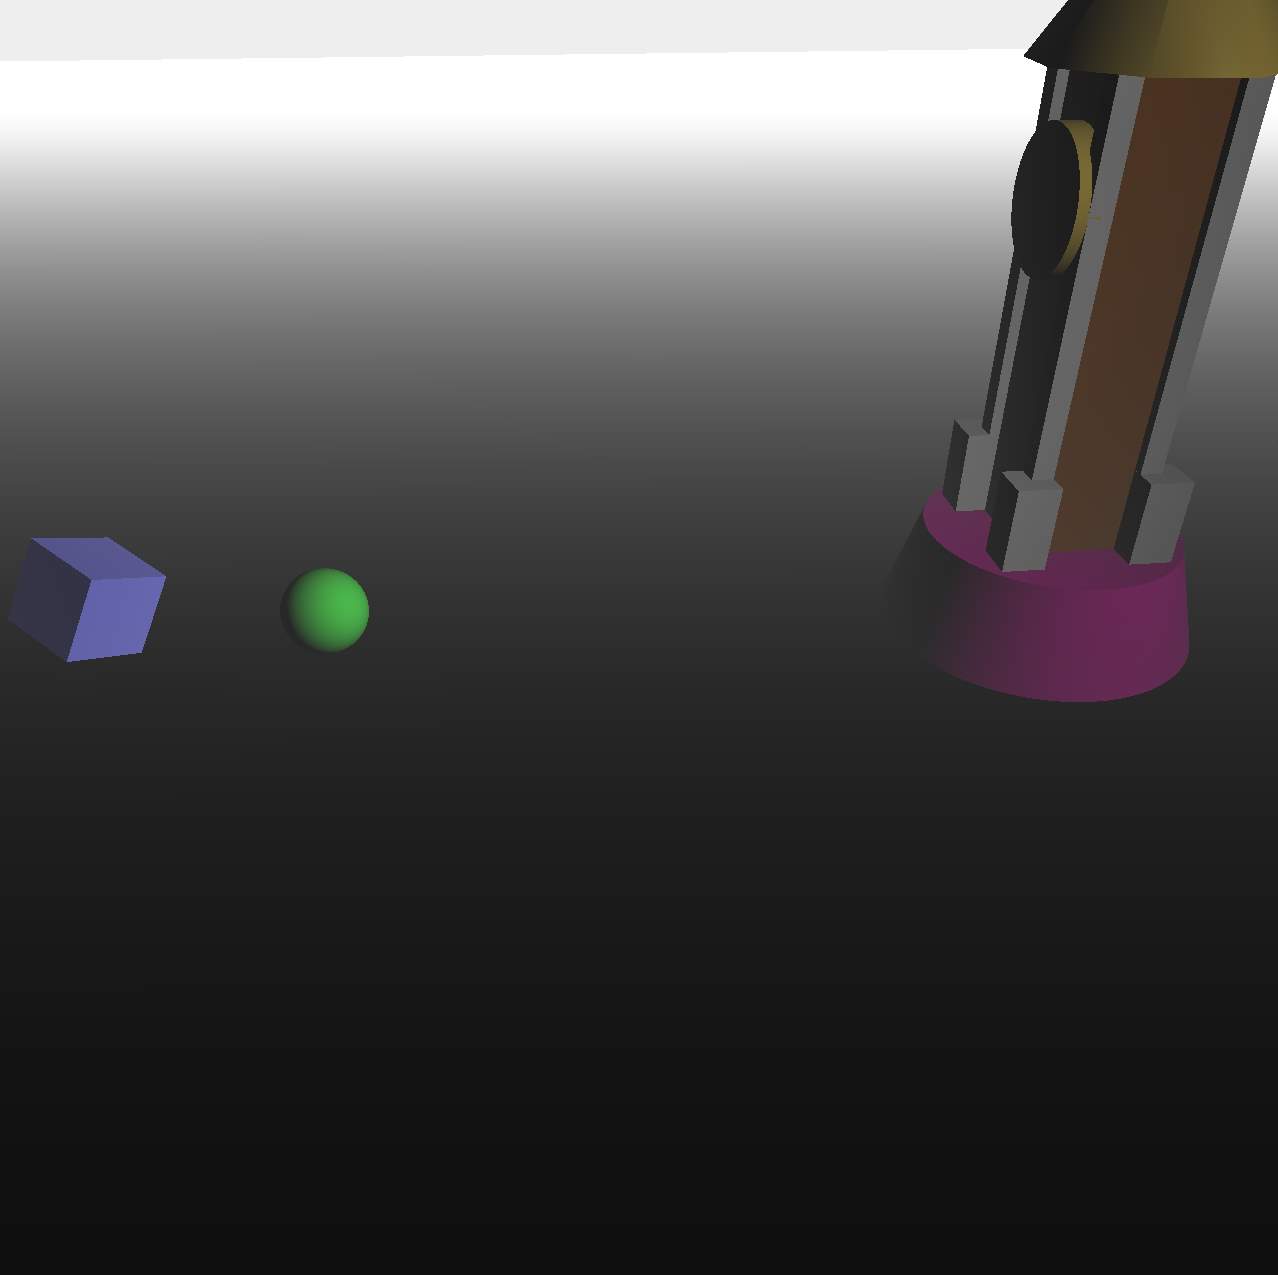
Here it is shown that the colour of the base has changed yet again to a beige colour, and that the helicopter is indeed rising whilst circling the tower. It should also be noted here that the scene is being shown at a difference angle and position from the camera, and is an example of the use of the keyboard to move the camera around the scene.
This final image shows the alternate lighting method using a spotlight. When using a spotlight, only immediate objects are lit up, and thus is completely different to the orthographic lighting of the directional light. Fog was incorporated into the scene in order to give a “dusk” setting for the scene. Additionally, the helicopter has now risen above the tower and is now out of sight.
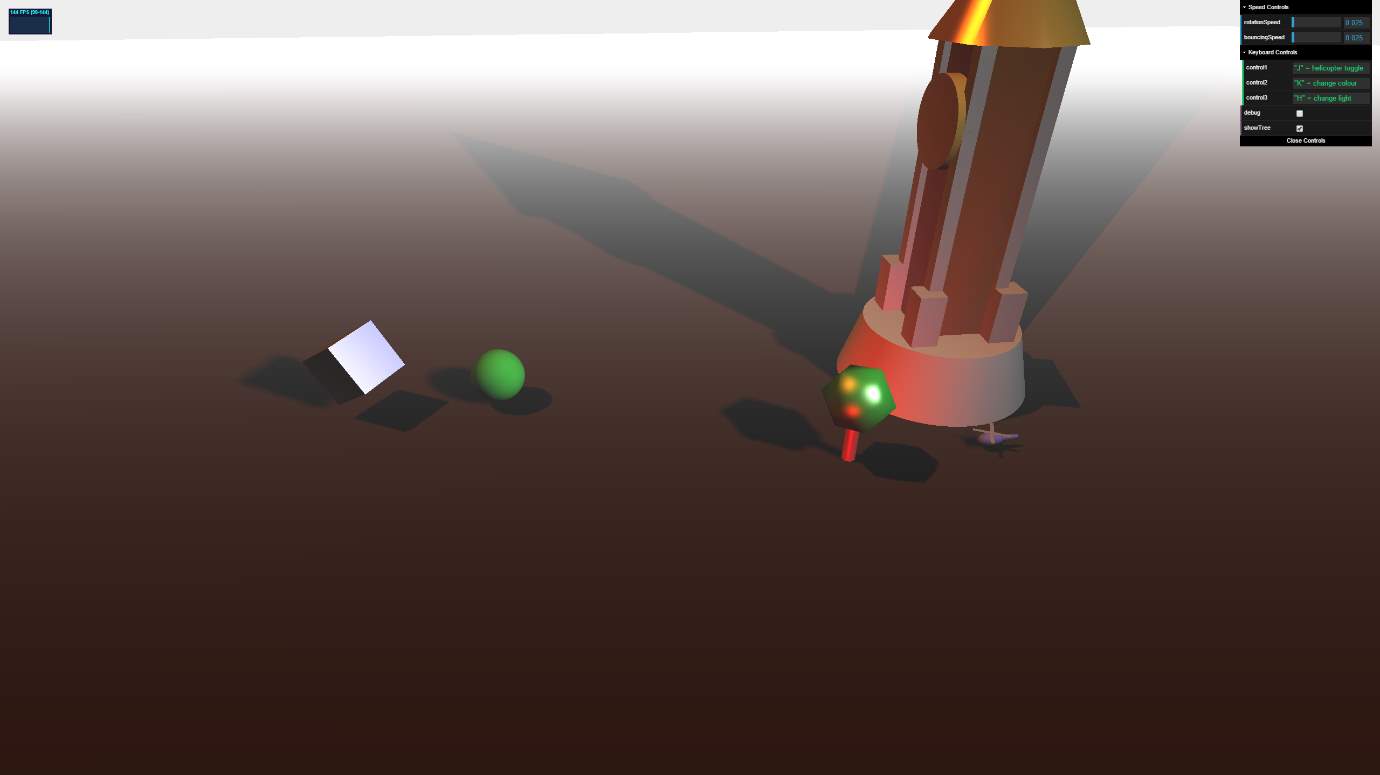
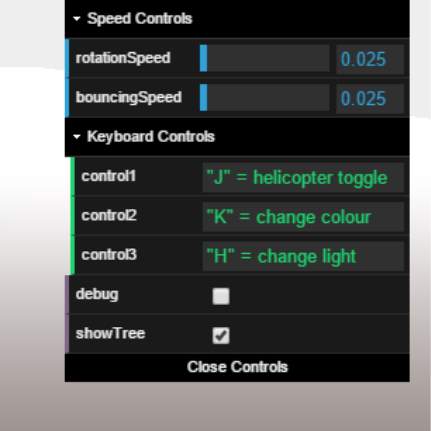
Above is a screen capture of the final scene, displaying the on-screen clickable GUI and keycode input options for the user to interact with the scene. Here the mouse and keyboard controls have been separated to aide user understanding of the interface.
Scene Graph of Code
Below is the laid out code for the finished scene.
<!DOCTYPE html>
<html>
<head>
<title>Tower Building Scene</title>
<link rel=”shortcut icon” href=”../favicon.ico”>
<script type=”text/javascript” src=”../libs/three.js”></script>
<script type=”text/javascript” src=”../libs/jquery.js”></script>
<script type=”text/javascript” src=”../libs/stats.js”></script>
<script type=”text/javascript” src=”../libs/dat.gui.js”></script>
<script type=”text/javascript” src=”../libs/Keypress.js”></script>
<style>
body{
/* set margin to 0 and overflow to hidden, to go fullscreen */
margin: 0;
overflow: hidden;
}
</style>
</head>
<body>
<div id=”Stats-output”>
</div>
<!– Div which will hold the Output –>
<div id=”WebGL-output”>
</div>
<script type=”text/javascript”>
var camera;
var scene;
var renderer;
// once everything is loaded, we run our Three.js stuff.
$(function () {
// introduces the the statistics windows that shows playback information
var stats = initStats();
// create a scene to hold the below content
var scene = new THREE.Scene();
// create a perspective camera
var camera = new THREE.PerspectiveCamera(60, window.innerWidth / window.innerHeight, 0.1, 1000);
// create a render and set the size
var renderer = new THREE.WebGLRenderer();
renderer.setClearColor(0xEEEEEE, 1.0);
renderer.setSize(window.innerWidth, window.innerHeight);
renderer.shadowMap.enabled = true;
// creates the ground plane with width and depth of 1024 units
var planeGeometry = new THREE.PlaneGeometry(1024, 1024);
// sets the colour of plane to a random value/colour
var planeMaterial = new THREE.MeshLambertMaterial({color: Math.random() * 0xffffff});
var plane = new THREE.Mesh(planeGeometry, planeMaterial);
plane.receiveShadow = true;
// rotate and position the plane, rotates by 90 degrees as PI radians is 180 degrees
plane.rotation.x = -0.5 * Math.PI;
plane.position.x = 15;
plane.position.y = 0;
plane.position.z = 0;
// add the plane to the scene
scene.add(plane);
// create a cube, this is the standard spinning cube of size 8x8x8
var cubeGeometry = new THREE.CubeGeometry(8, 8, 8);
// set the material of the cube to specular; specular in meshphone essentially means it is slightly shiny
var cubeMaterial = new THREE.MeshPhongMaterial({color: 0x7777ff, specular: 0x808080});
var cube = new THREE.Mesh(cubeGeometry, cubeMaterial);
cube.castShadow = true;
// position the cube
cube.position.x = -50;
cube.position.y = 8;
cube.position.z = 0;
// add the cube to the scene
scene.add(cube);
// create a sphere, vertex count is is 100 to increase quality
var sphereGeometry = new THREE.SphereGeometry(4, 100, 100);
var sphereMaterial = new THREE.MeshLambertMaterial({color: 0x32CD32});
var sphere = new THREE.Mesh(sphereGeometry, sphereMaterial);
// position the sphere
sphere.position.z = 0;
sphere.castShadow = true;
// add the sphere to the scene
scene.add(sphere);
// create and add building to scene
var buildingGroup = new THREE.Object3D();
var buildingMaterial = new THREE.MeshLambertMaterial({color: 0x8b4513});
buildingGroup.position.x = 20;
buildingGroup.position.y = 0;
buildingGroup.position.z = 0;
// add the building group to the scene
scene.add(buildingGroup);
// create the main building, this will the main tower shape, which will then be linked to a parent object named buildingGroup
var buildingBodyGeometry = new THREE.CubeGeometry(10, 50, 10);
var buildingBody = new THREE.Mesh(buildingBodyGeometry, buildingMaterial);
// shadows will be cast from the object by the light
buildingBody.castShadow = true;
// position the main building, these are relative coordinates as not to ruin the shape if we move the entire buildingGroup object
buildingBody.position.x = buildingGroup.position.x + 0;
buildingBody.position.y = buildingGroup.position.y + 25;
buildingBody.position.z = buildingGroup.position.z + 0;
// add the main building to the building group, it is now a child of buildingBody
buildingGroup.add(buildingBody);
//creates a new material to be used by both furnishings, since they are different object but rely on the same aesthetic
var furnishingMaterial = new THREE.MeshPhongMaterial({color: 0xc0c0c0, specular: 0x808080, shininess: 100});
// create the furnishings
var buildingFurnishingGeometry = new THREE.CubeGeometry(4, 8, 4);
// create array for storying and arranging parts – this arranges the vertical slats that go around the main tower neatly
var buildingFurnishings = [];
// creates a loop for i, such that there are different cases for every new furnishing
for (var i = 0; i < 16; i++) {
buildingFurnishings[i] = new THREE.Mesh(buildingFurnishingGeometry, furnishingMaterial);
buildingFurnishings[i].castShadow = true;
if (i % 2 === 0) { // i = 0 or 2
// here we can see yet again, location is relative to the parent to preserve structure
buildingFurnishings[i].position.x = buildingGroup.position.x + -6;
} else { // i = 1 or 3
buildingFurnishings[i].position.x = buildingGroup.position.x + 6;
}
buildingFurnishings[i].position.y = buildingGroup.position.y + 14;
if (i < 2) { // i = 0 or 1
buildingFurnishings[i].position.z = buildingGroup.position.z + 6;
} else { // i = 2 or 3
buildingFurnishings[i].position.z = buildingGroup.position.z – 6;
}
buildingGroup.add(buildingFurnishings[i]);
}
// create the furnishings
var fineBuildingFurnishingGeometry = new THREE.CubeGeometry(2, 50, 2);
// create array for storying and arranging parts
var fineBuildingFurnishings = [];
for (var i = 0; i < 16; i++) {
//this is an identical loop, but handles the location of the new items differently
fineBuildingFurnishings[i] = new THREE.Mesh(fineBuildingFurnishingGeometry, furnishingMaterial);
fineBuildingFurnishings[i].castShadow = true;
if (i % 2 === 0) { // i = 0 or 2
fineBuildingFurnishings[i].position.x = buildingGroup.position.x – 5;
} else { // i = 1 or 3
fineBuildingFurnishings[i].position.x = buildingGroup.position.x + 5;
}
fineBuildingFurnishings[i].position.y = buildingGroup.position.y + 25;
if (i < 2) { // i = 0 or 1
fineBuildingFurnishings[i].position.z = buildingGroup.position.z + 5;
} else { // i = 2 or 3
fineBuildingFurnishings[i].position.z = buildingGroup.position.z – 5;
}
buildingGroup.add(fineBuildingFurnishings[i]);
}
// create a tree – this will be an aesthetic addition to the tower in order to broaden the viewing experience
var treeGeometry = new THREE.CylinderGeometry(1, 1, 10);
var treeMaterial = new THREE.MeshPhongMaterial({color: 0xa52a2a, specular: 0x808080});
var tree = new THREE.Mesh(treeGeometry, treeMaterial);
tree.castShadow = true;
// position the tree
tree.position.x = 20;
tree.position.y = 5;
tree.position.z = 20;
// add the tree to the scene
scene.add(tree);
var bushGeometry = new THREE.IcosahedronGeometry(5);
var bushMaterial = new THREE.MeshPhongMaterial({color: 0x32CD32, specular: 0x808080});
var bush = new THREE.Mesh(bushGeometry, bushMaterial);
bush.castShadow = true;
// position the bush, as you can see the position is relative to the tree it will be sitting on
bush.position.x = tree.position.x;
bush.position.y = tree.position.y + 5;
bush.position.z = tree.position.z;
// add the bush to the scene
scene.add(bush);
// create and add the clock to scene – the clock will be the face of the tower
var clock = new THREE.Object3D();
// create the clock cylinder shape
var clockGeometry = new THREE.CylinderGeometry(6, 6, 2, 100);
//specular and shininess is chosen to give the golden colour its realistic shine
var clockMaterial = new THREE.MeshLambertMaterial({color: 0xd4af37, specular: 0x808080, shininess: 100});
var clock = new THREE.Mesh(clockGeometry, clockMaterial);
clock.castShadow = true;
// position the clock against the tower
clock.position.x = buildingGroup.position.x – 6;
clock.position.y = buildingGroup.position.y + 40;
clock.position.z = buildingGroup.position.z;
// as seen below, the cylinder needs to be rotated along the z axis in order to look like a face
clock.rotation.z = buildingGroup.rotation.z + Math.PI / 2;
// add the clock to the scene
scene.add(clock);
buildingGroup.add(clock);
//create and add the base to scene, this will be the base of the building
var base = new THREE.Object3D();
//create the clock
var baseGeometry = new THREE.CylinderGeometry(15, 12, 10, 100);
var baseMaterial = new THREE.MeshLambertMaterial({color: 0xd3d3d3, specular: 0x808080, shininess: 100});
var base = new THREE.Mesh(baseGeometry, baseMaterial);
base.castShadow = true;
// position and rotate the base relative to the parent
base.position.x = buildingGroup.position.x;
base.position.y = buildingGroup.position.y + 5;
base.position.z = buildingGroup.position.z;
base.rotation.z = buildingGroup.rotation.z + Math.PI;
// add the base to the scene
scene.add(base);
buildingGroup.add(base);
// create and add the roof to scene
var roof = new THREE.Object3D();
// create the clock
var roofGeometry = new THREE.CylinderGeometry(10, 0, 15);
var roofMaterial = new THREE.MeshPhongMaterial({color: 0xd4af37, specular: 0x808080, shininess: 100});
var roof = new THREE.Mesh(roofGeometry, roofMaterial);
roof.castShadow = true;
// position the roof
roof.position.x = buildingGroup.position.x;
roof.position.y = buildingGroup.position.y + 57.5;
roof.position.z = buildingGroup.position.z;
roof.rotation.z = buildingGroup.rotation.z + Math.PI;
// add the roof to the scene
scene.add(roof);
buildingGroup.add(roof);
var copterOrbitRadius = 20; // this is the helicopter’s orbit radius
var copterHeight = 0; // this is the helicopter’s height
// create an orbit group which will rotate
var orbitGroup = new THREE.Object3D();
orbitGroup.position.x = buildingGroup.position.x + 20;
scene.add(orbitGroup);
var debugMaterial = new THREE.MeshLambertMaterial({color: 0x808080});
var debugGeometry = new THREE.CylinderGeometry(0.2, 0.2, 10);
var orbitAxis = new THREE.Mesh(debugGeometry, debugMaterial);
orbitAxis.visible = false;
orbitGroup.add(orbitAxis);
var orbitRadius = new THREE.Mesh(debugGeometry, debugMaterial);
orbitRadius.rotation.z = -0.5 * Math.PI;
orbitRadius.position.x = copterOrbitRadius / 2;
orbitRadius.scale.y = copterOrbitRadius / 10;
orbitRadius.position.y = copterHeight;
orbitRadius.visible = false;
orbitGroup.add(orbitRadius);
var circleGeometry = new THREE.CircleGeometry(1, 20);
var orbit = new THREE.Mesh(circleGeometry, debugMaterial);
orbit.receiveShadow = true;
orbit.rotation.x = -0.5 * Math.PI;
orbit.scale.x = copterOrbitRadius;
orbit.scale.y = copterOrbitRadius;
orbit.position.y = 0.1;
orbit.visible = false;
orbitGroup.add(orbit);
// create a copter group to contain the entire helicopter and add it to the orbit group
var copterGroup = new THREE.Object3D();
copterGroup.position.x = copterOrbitRadius;
orbitGroup.add(copterGroup);
// create a group to contain the helicopter body and add it to the copter group
var bodyGroup = new THREE.Object3D();
copterGroup.add(bodyGroup);
// create a group to contain the rotor blades and add it to the copter group
var rotorGroup = new THREE.Object3D();
rotorGroup.position.y = copterHeight + 1;
copterGroup.add(rotorGroup);
var rotorMaterial = new THREE.MeshLambertMaterial({color: 0xA0A0A0});
var rotorGeometry = new THREE.CubeGeometry(5, 0.01, 0.5);
// create a rotor blade
var rotor1 = new THREE.Mesh(rotorGeometry, rotorMaterial);
rotor1.castShadow = true;
// add the rotor blade to the rotor group
rotorGroup.add(rotor1);
// create another rotor blade at right angles to the first
var rotor2 = new THREE.Mesh(rotorGeometry, rotorMaterial);
rotor2.rotation.y = 0.5 * Math.PI;
rotor2.castShadow = true;
// add the rotor blade to the rotor group
rotorGroup.add(rotor2);
var bodyMaterial = new THREE.MeshLambertMaterial({color: 0x7777ff});
// create a sphere (radius 1) to use a a cockpit
var cockpitGeometry = new THREE.SphereGeometry(1);
var cockpit = new THREE.Mesh(cockpitGeometry, bodyMaterial);
cockpit.castShadow = true;
// extend the sphere by a factor of 2 in the x direction to represent a cockpit
cockpit.scale.x = 2;
// position the cockpit
cockpit.position.y = copterHeight;
cockpit.rotation.y = 0.5 * Math.PI;
// add the cockpit to the body group
bodyGroup.add(cockpit);
// create a cylinder radius 0.5 at one end, 0.3 at the other end and length 3 to represent a tail
var tailGeometry = new THREE.CylinderGeometry(0.5, 0.3, 3);
var tail = new THREE.Mesh(tailGeometry, bodyMaterial);
tail.castShadow = true;
// position the tail
tail.position.z = -2.5;
tail.position.y = copterHeight;
tail.rotation.x = 0.5 * Math.PI;
// add the tail to the body group
bodyGroup.add(tail);
orbitGroup.add(copterGroup);
// add subtle ambient lighting
// ambient light is a consistenly abundant light source, which for this scene was detremental to the experience
// it was therefore never introduced into the scene
var ambientLightColour = “#d3d3d3”;
var ambientLight = new THREE.AmbientLight(ambientLightColour);
// scene.add(ambientLight);
// add a white spotLight for the shadows
// multiple light sources are implemented to allow the player to jump between them and see the scene in different ways
var spotLightColour = “#ff0000”;
var spotLight = new THREE.SpotLight(spotLightColour);
spotLight.position.set(2, 2, 50);
spotLight.castShadow = true;
spotLight.target = buildingGroup;
scene.add(spotLight);
renderer.shadowMapEnabled = true;
spotLight.visible = true;
// add spotLight for the shadows
var dirLightColour = “#d3d3d3”;
// it is good practice to pre-declare values and then insert them, so that you can change the values with more ease later on
var dirLight = new THREE.SpotLight(dirLightColour);
dirLight.position.set(100, 100, 100);
dirLight.castShadow = true;
//the light will look directly at the bouncing sphere, and hence will tilt up and down as the sphere bounces
dirLight.target = sphere;
scene.add(dirLight);
renderer.shadowMapEnabled = true;
spotLight.visible = true;
// adds an orange sunlight effect using directionalLights
// directional lights are orthographic in nature, so their distance to the target is irrelevant
var pointColor = “#ff5808″;
var directionalLight = new THREE.DirectionalLight(pointColor);
directionalLight.position.set(-40, 60, -10);
directionalLight.castShadow = true;
directionalLight.shadowCameraNear = 2;
directionalLight.shadowCameraFar = 200;
directionalLight.shadowCameraLeft = -50;
directionalLight.shadowCameraRight = 50;
directionalLight.shadowCameraTop = 50;
directionalLight.shadowCameraBottom = -50;
directionalLight.distance = 0;
directionalLight.intensity = 0.5;
directionalLight.shadowMapHeight = 1024;
directionalLight.shadowMapWidth = 1024;
scene.add(directionalLight);
directionalLight.visible = true;
// introduced fog, exponential fog was originally implemented, but upon testing, it made the scene too hard to see
// scene.fog = new THREE.FogExp2(0xffffff, 0.015, 400);
scene.fog = new THREE.Fog(0xffffff, 0.015, 400);
// create controls
var controls = new function () {
//these two below values are associated to how fast the cube and ball will rotate and go through the bouncing animation
this.rotationSpeed = 0.025;
this.bouncingSpeed = 0.025;
this.control1 = ‘”J” = helicopter toggle’;
this.control2 = ‘”K” = change colour’;
this.control3 = ‘”H” = change light’;
this.fog = false;
this.debug = false;
this.showTree = true;
};
// creates and instanciates the GUI
var gui = new dat.GUI();
var speedSet = gui.addFolder(‘Speed Controls’);
speedSet.open();
gui.add(controls, ‘rotationSpeed’, 0, 0.5);
gui.add(controls, ‘bouncingSpeed’, 0, 0.5);
// introduces keyboard controls tab,
//these controls will be fields which hold static information in the GUI
var keys = gui.addFolder(‘Keyboard Controls’);
keys.add(controls, ‘control1’);
keys.add(controls, ‘control2’);
keys.add(controls, ‘control3’);
keys.open();
gui.add(controls, ‘debug’).onChange(function (e) {
orbitAxis.visible = e;
orbitRadius.visible = e;
orbit.visible = e;
});
// this will be a GUI toggle to set the tree in the scene to visible or not
gui.add(controls, ‘showTree’).onChange(function (e) {
//sets the tree and bush visibility to the equivalent of the toggle; if the toggle is true, the visibility will be true
tree.visible = e;
bush.visible = e;
});
// add the output of the renderer to the html element
$(“#WebGL-output”).append(renderer.domElement);
// call the render function
var angle = 0;
render();
// position and point the camera to the center of the scene – just before render to minimise update errors
camera.position.x = -10;
camera.position.y = 60;
camera.position.z = 90;
camera.lookAt(scene.position);
function render() {
stats.update();
// rotate the cube around its axes
// the cube will spin in the x, y and z axis in tandem
cube.rotation.x += controls.rotationSpeed;
cube.rotation.y += controls.rotationSpeed;
cube.rotation.z += controls.rotationSpeed;
// bounce the sphere up and down, according to the
angle += controls.bouncingSpeed;
//cos is short for cosign, which would be the horizontal component/value of a right angle triangle in trigonometry
//cos ensures that the axis is in the X axis
sphere.position.x = -20 + (10 * (Math.cos(angle)));
//sin would be the vertical component/value of a right angle triangle in trigonometry
//sin ensures that the axis is in the X axis
sphere.position.y = 2 + (10 * Math.abs(Math.sin(angle)));
// rotate the orbit group
angle += 0.02;
orbitGroup.rotation.y = -angle / 10;
orbitGroup.position.y = 0 + (angle / 10);
// rotate the rotor blade group around the y-axis
rotorGroup.rotation.y += 0.3;
// render using requestAnimationFrame
requestAnimationFrame(render);
renderer.render(scene, camera);
roof.rotation.y += controls.rotationSpeed;
}
// handles playback statistics
function initStats() {
var stats = new Stats();
stats.setMode(0); // 0: fps, 1: ms
// align stats to top-left, giving a 16 pixel grace
// setting the position to absolute means that no matter how big the screen is or the resolution, it will always be in the top right
stats.domElement.style.position = ‘absolute’;
stats.domElement.style.left = ’16px’;
stats.domElement.style.top = ’16px’;
$(“#Stats-output”).append(stats.domElement);
return stats;
}
var keypress = new window.keypress.Listener();
//this is designed to hide the helicopter used in the scene,
// if the user presses the J key, all attributes of the helicopter will be turned invisible
keypress.simple_combo(“j”, function () {
rotor1.visible = !rotor1.visible;
rotor2.visible = !rotor2.visible;
cockpit.visible = !cockpit.visible;
tail.visible = !tail.visible;
});
//changes the colour of the base of the tower to a random value if the user presses the K key
keypress.simple_combo(“k”, function () {
base.material.color.setHex(Math.random() * 0xffffff);
});
//pressing H will switch between lights in the scene
keypress.simple_combo(“h”, function () {
directionalLight.visible = !directionalLight.visible;
spotLight.visible = !spotLight.visible;
});
//these are simple WASD controls to handle movement of the camera
//essentially turning this scene into a first person experience
//this allows the user to look at the details of the lighting and colour up close
keypress.simple_combo(“w”, function () {
// moves the camera inwards, whilst adjusting to the angle
camera.position.x -= 0.5 * Math.sin(camera.rotation.y);
camera.position.z -= 0.5 * Math.cos(camera.rotation.y);
});
keypress.simple_combo(“s”, function () {
camera.position.x += 0.5 * Math.sin(camera.rotation.y);
camera.position.z += 0.5 * Math.cos(camera.rotation.y);
});
//pressing the A key turns the camera to the left
keypress.simple_combo(“a”, function () {
camera.rotation.y += 0.02;
});
//pressing the D key turns the camera to the left
keypress.simple_combo(“d”, function () {
camera.rotation.y -= 0.02;
});
//since the WASD keys are taken up, new keys are needed to handle rotation
//pressing O will turn the camera upwards, essentially acting as a pitch adjuster
keypress.simple_combo(“o”, function () {
camera.rotation.x += 0.02;
});
//pressing l will turn the camera downwards, essentially acting as a pitch adjuster
keypress.simple_combo(“l”, function () {
camera.rotation.x -= 0.02;
});
});
</script>
</body>
</html>